
Entering a Vyapar referral code is not hard. The catch is that the box for it appears only once, and many people tap “Create Account” without noticing it. They find out later that they could have had extra months.
This guide follows the exact path we took on a phone. Every screen has a screenshot, and there is a short video further down. The code is PNQ1G9, and it gives you 3 to 6 months extra. How many extra months you get depends on your plan and duration.
Get VyaparKeep these 3 things ready before you start
Sign-up takes about five minutes, but an OTP arrives halfway through. Have these ready:
- The mobile number or email you want to use for your Vyapar account. The OTP goes here.
- The referral code PNQ1G9. Copy it now so you can paste it on the OTP screen instead of typing.
- An idea of whether you need Vyapar on mobile only, desktop only, or both. You will need this when choosing a plan.
Step 1: open vyaparapp.in
Open vyaparapp.in in your phone’s browser. Tap the menu (☰) at the top left, tap Login, and then tap “Create Account” at the top right of the login box.

On a computer it works the same way, except Login and Create Account appear at the top instead of inside a menu.
Step 2: enter your mobile number or email
On the Create Account screen, enter your mobile number. To sign up with email instead, tap “Create account using email”. Then tap “Get OTP”.
One thing to keep in mind: the number you enter here becomes your Vyapar login. If you run the shop on a business number, use that rather than your personal one.
Step 3: enter the referral code with the OTP (the step that matters)
The “Enter OTP” screen opens next. Right below the OTP box there is a second box: “Invite Code (if any)”. This is where the referral code goes.
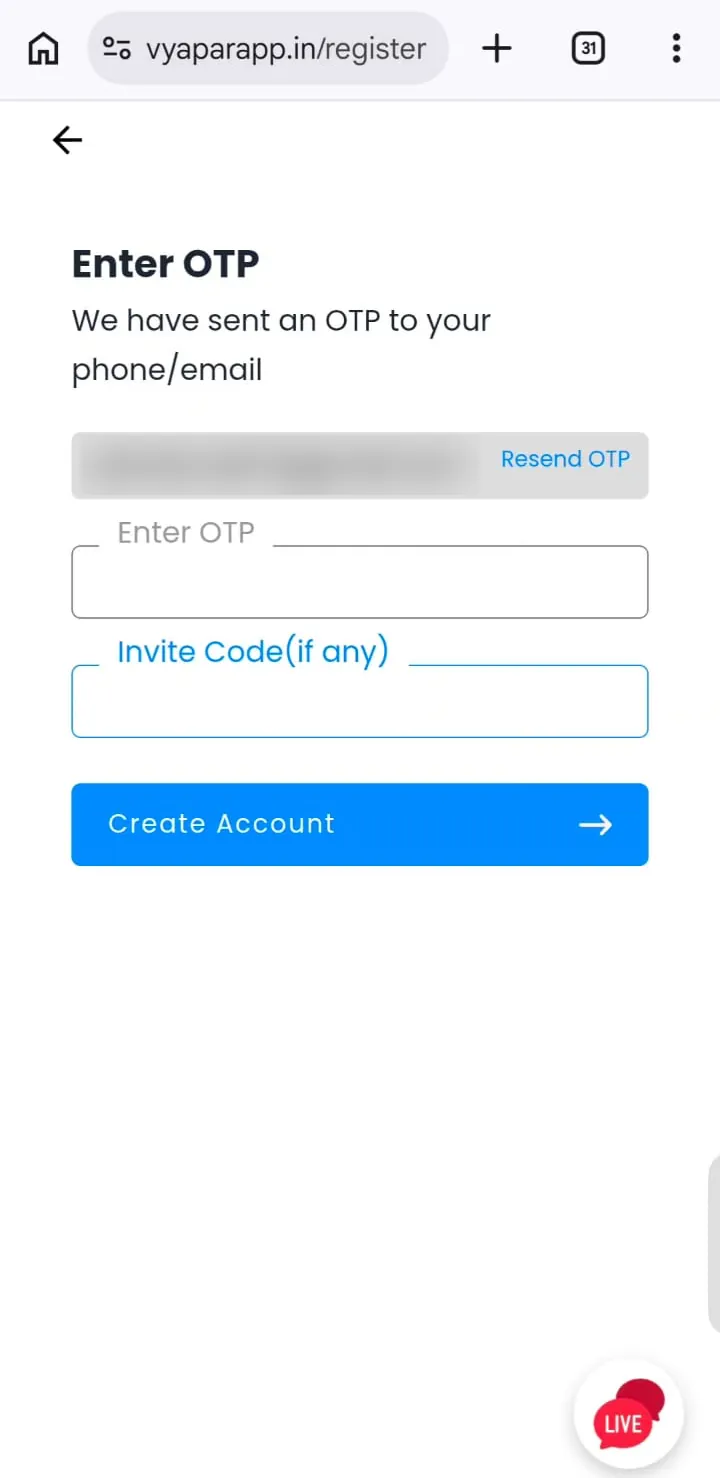
- Enter the OTP you received on your phone or email.
- Paste PNQ1G9 into the “Invite Code (if any)” box.
- Check the code once: P-N-Q-1-G-9. It has a Q (not an O) and the number 1 (not the letter I). All capitals.
- Now tap “Create Account”.
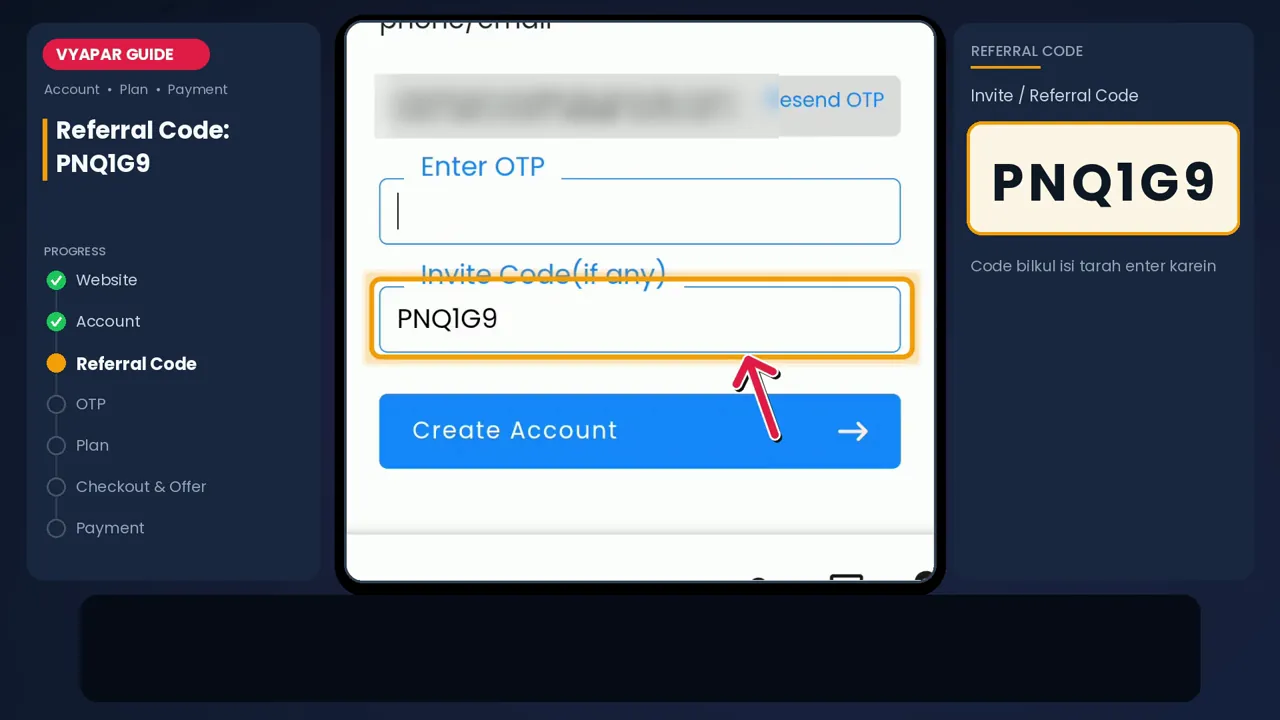
If you do not see this box, the most common reason is that you are logging in to an account that already exists. The box appears only when you create a new account. We wrote about this separately: what existing users can do.
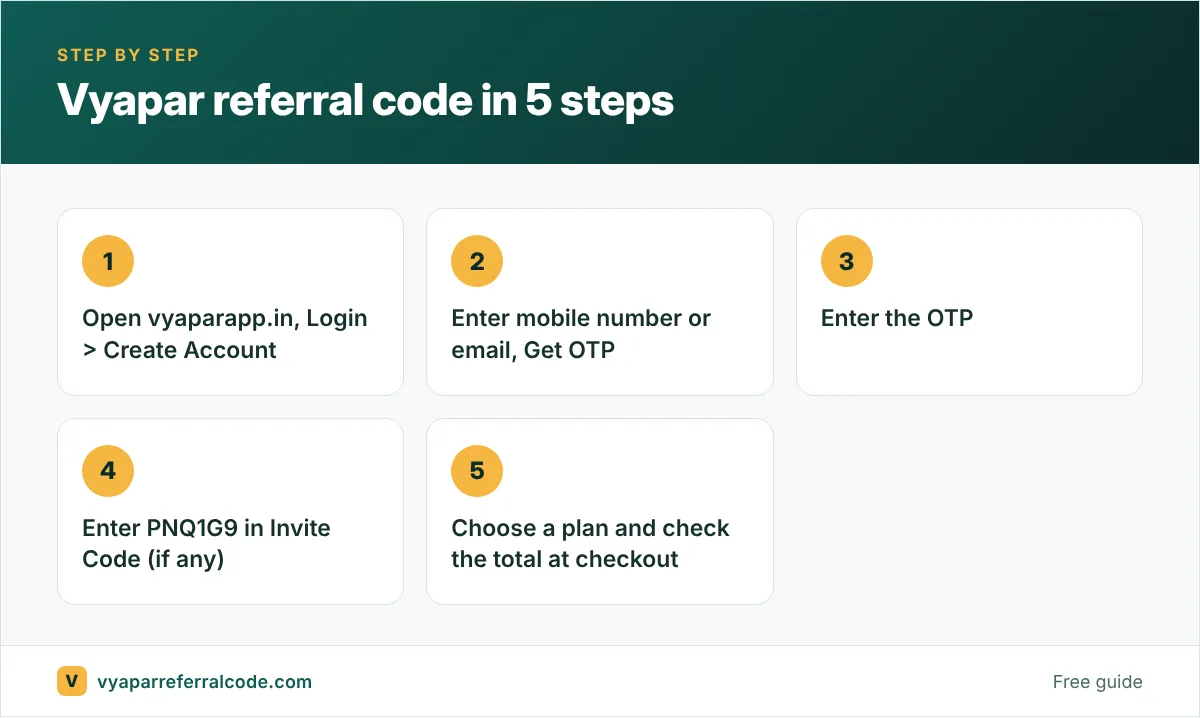
Step 4: choose device and duration
Once the account is created, Vyapar takes you to the pricing page. There are two filters at the top: device type and time.
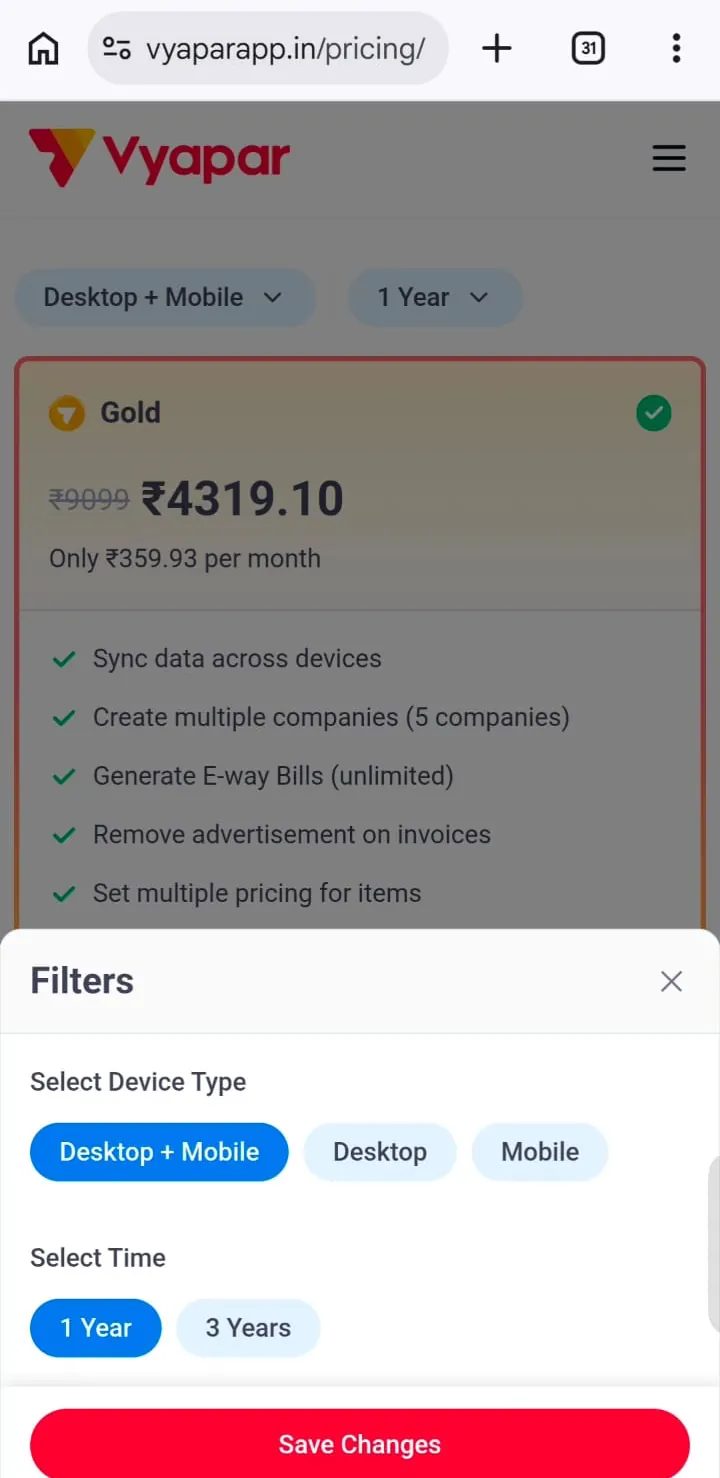
- Mobile: billing on your phone only.
- Desktop: on your computer only.
- Desktop + Mobile: both, with data in sync.
For duration you can pick 1 year or 3 years. A 3-year plan costs more upfront but works out cheaper per month. When we checked on 24 September 2026, 3-year Gold came to roughly ₹220 a month, against roughly ₹360 a month for 1-year Gold. Prices change with sales, so go by what your screen shows today. The full breakdown is in our Vyapar price guide.
Step 5: Silver or Gold
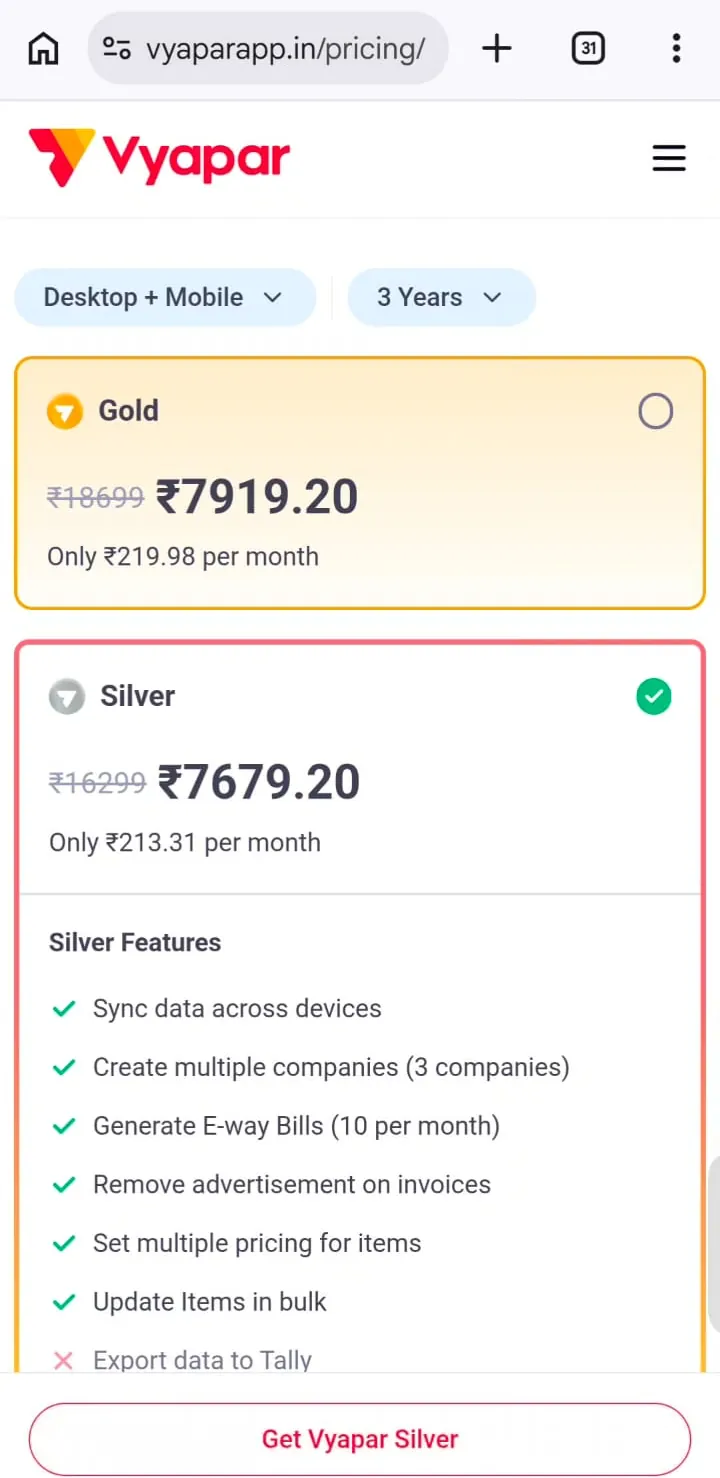
The short answer: if you run more than 3 companies, make more than 10 e-way bills a month, or your CA uses Tally, take Gold. Otherwise Silver is enough. The full difference is in Silver vs Gold.
Step 6: always check the total at checkout
After you choose a plan, the checkout page opens. Look at three things here:
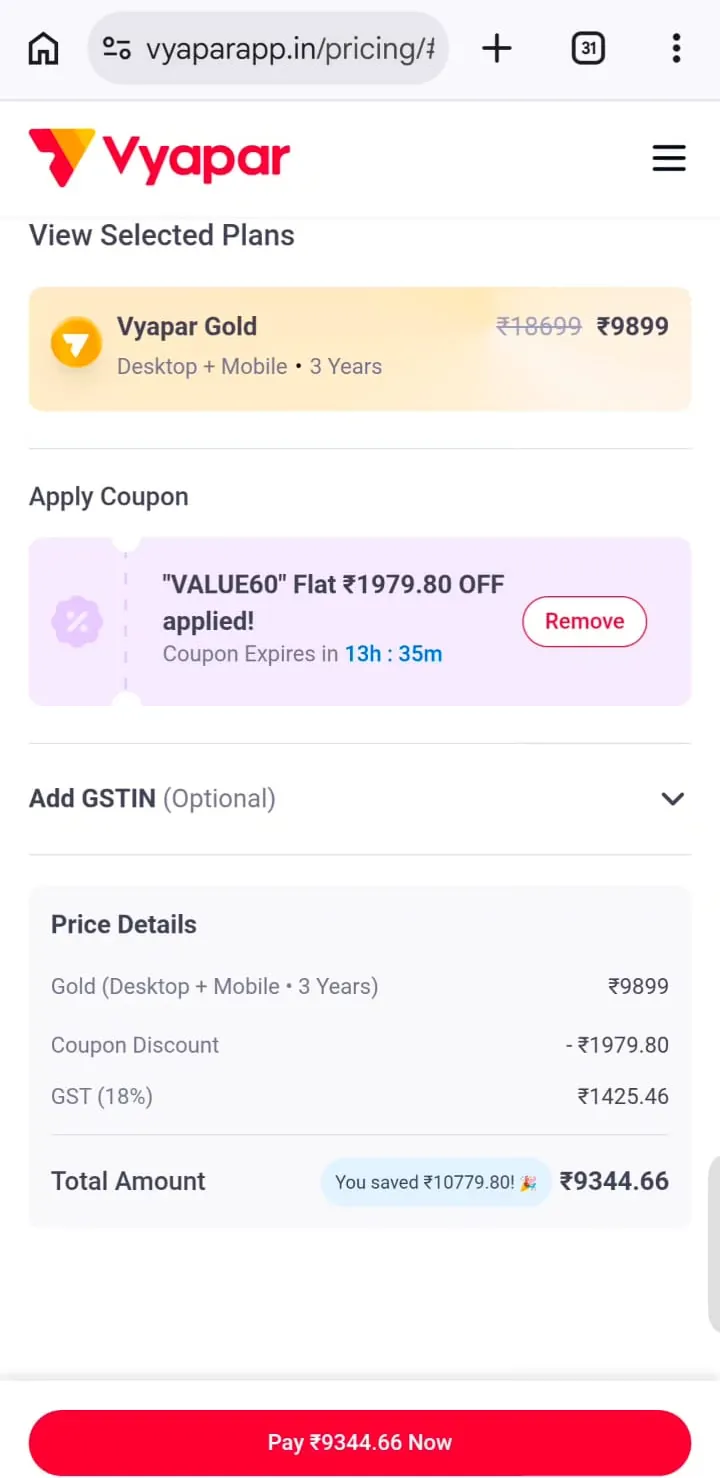
- Apply Coupon: during a sale, a coupon is sometimes applied automatically. On our day it was “VALUE60”.
- GST (18%): the price on the plan card does not include GST. Checkout adds 18% GST on top.
- Total Amount: this is what you pay.
Why the card price and the checkout total differ is explained line by line in checkout explained.
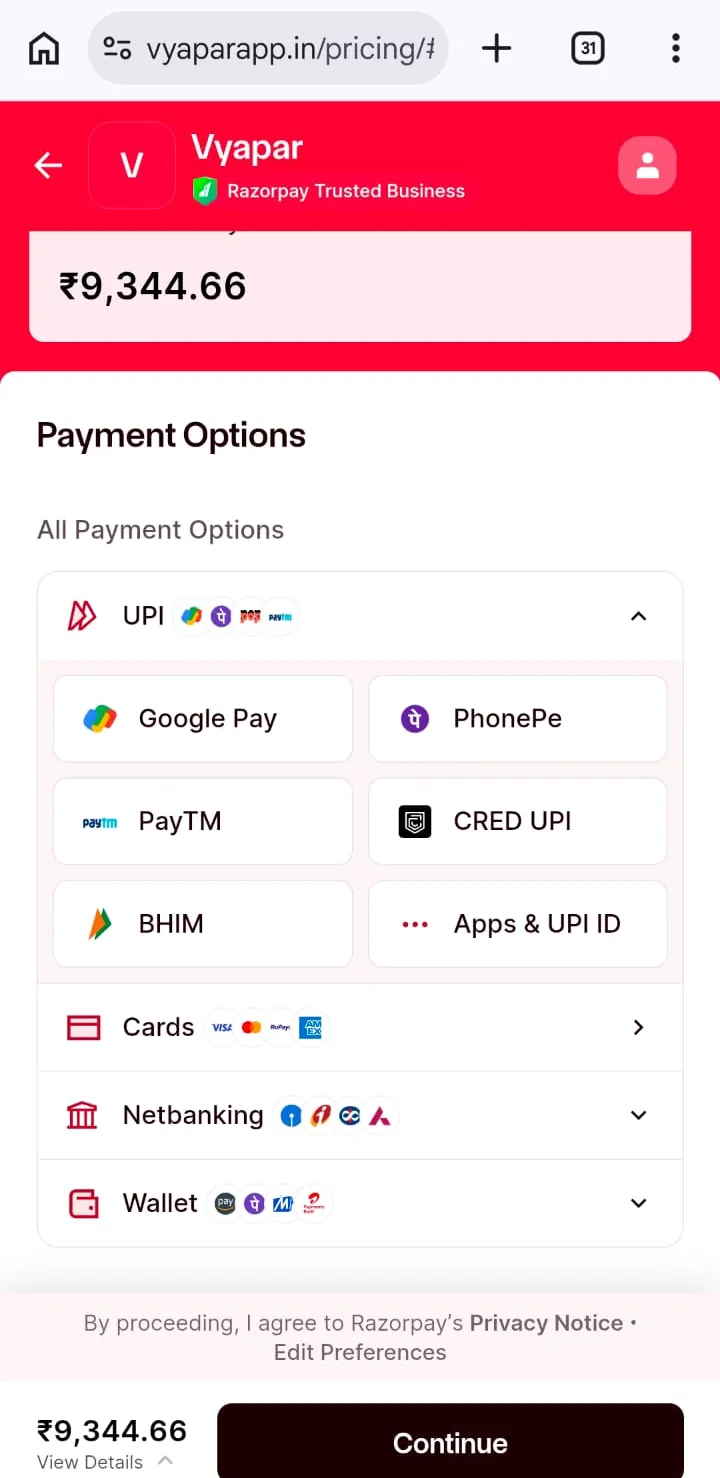
Step 7: payment
Tap “Pay Now” and the Razorpay payment page opens. Pay with UPI (Google Pay, PhonePe, Paytm, BHIM), card, netbanking or a wallet, whichever suits you.
Video: the whole process in 3 minutes
If watching is easier than reading, here is our screen recording of the full sign-up. The on-screen notes are in Hindi, but every step matches the screenshots above.
Referral code vs coupon code
People often treat these as the same thing. A referral code (invite code) is entered only once, on the OTP screen while creating the account. A coupon code appears at checkout and lowers the plan price. They sit at different steps, so you can benefit from both. More detail: referral code vs coupon code.
Code not working? Check these
- Is there a space in the code? Copy-paste often adds a space before or after it.
- Are you creating a new account? The box does not appear for existing accounts.
- The code has to go in together with the OTP. Once you tap Create Account, this screen does not come back.
If you still have trouble, contact Vyapar customer care or ask us through our contact page.
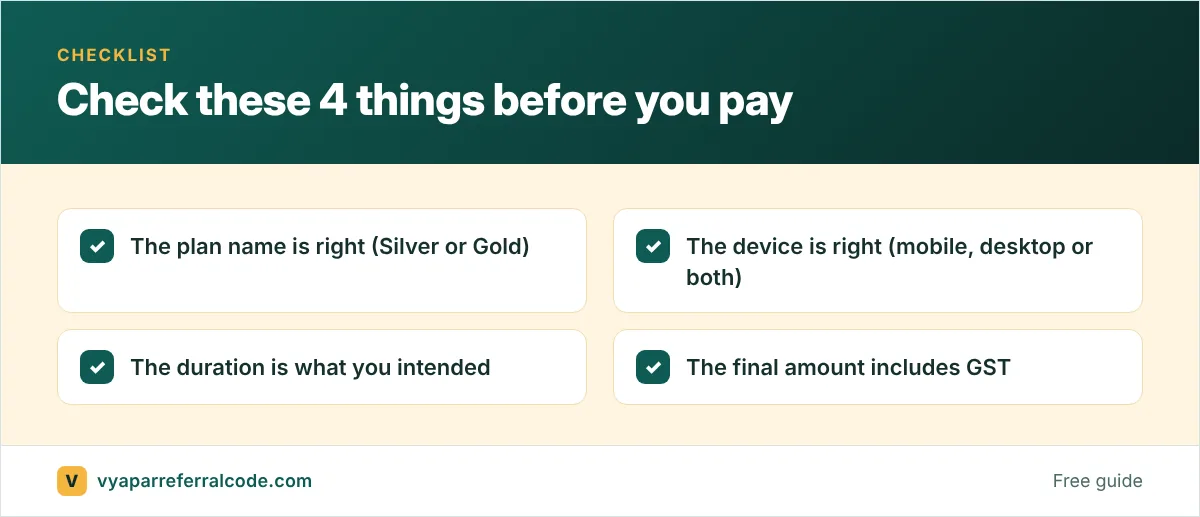
A quick example: what to check before you pay
Say you chose Gold, Desktop + Mobile, 1 year. Checkout should show three things: the plan name, the duration and the final amount including GST. The referral benefit is added as extra months on your plan, so it does not have to appear as a discount in the checkout total. This is the part that confuses most people.
After paying, open the app and look at your plan details. If the extra months are not showing, give it a little time. If they still do not appear, contact Vyapar support and tell them you entered invite code PNQ1G9 at sign-up. A screenshot helps.
Which plan to pick: simple advice
- Billing and stock only, one shop, one device: starting with Silver is fine.
- Separate staff logins, more reports, or more than one device: look at Gold.
- A longer duration (such as 3 years) usually costs less per year, and the referral’s extra months also vary with duration.
For a full comparison read Silver vs Gold and price plans. The difference between the free and paid versions is explained here.
Frequently asked questions
Where do I enter the Vyapar referral code?
On the OTP screen while creating a new account, in the “Invite Code (if any)” box right below the OTP box.
What does the referral code give me?
This code gives you 3 to 6 months extra. The exact number of months depends on your plan and duration.
Can I add the code to an existing account?
We did not find an option for this inside the app. You can ask Vyapar support, but there is no guarantee they will add it.
Can I use a coupon and the referral code together?
Yes. The referral code goes in at sign-up and the coupon at checkout, so they work separately.
For any other questions, see our step-by-step page and FAQ.