This guide shows how to register on Vyapar with the referral code PNQ1G9: where to apply the invite code, how to choose a plan, and what to do if the code is not working. It takes about five minutes. We last went through these steps on 25 September 2026.
What you need before you start
- A mobile number or email address that can receive an OTP.
- The referral code PNQ1G9. Copy it with the button on this page so there are no typing mistakes.
- A way to pay: UPI, debit or credit card, net banking or a wallet.
- A new account. The invite code can only be added while you create an account, not when you log in to an existing one.
Step 1: Open the Vyapar sign-up screen
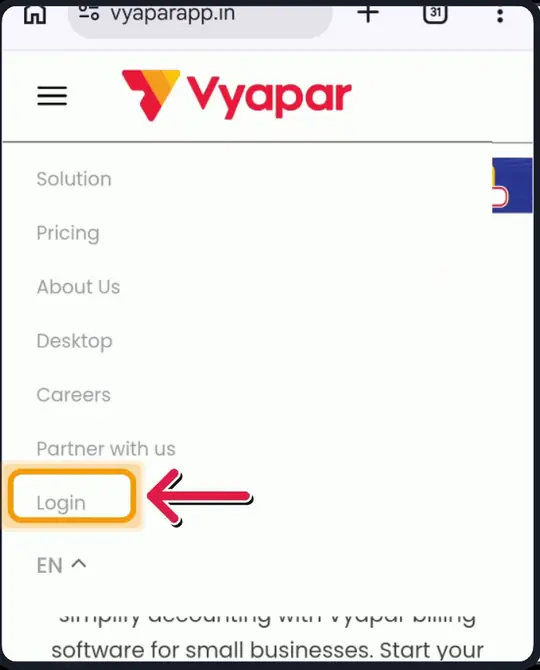
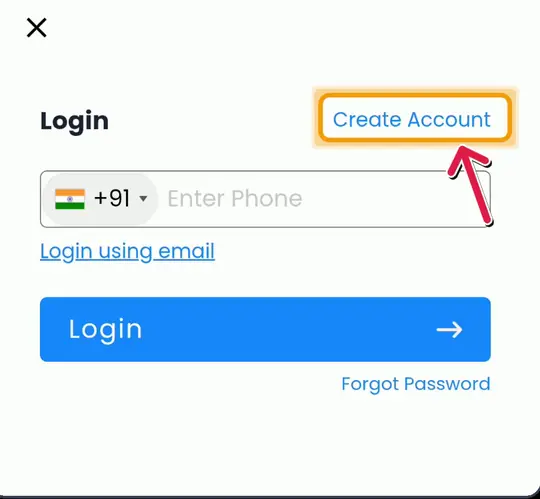
Tap Get Vyapar on this page, or open vyaparapp.in in your browser. On a phone, open the menu (☰) at the top right and tap Login. A login box appears. Tap Create Account in its top-right corner to switch to sign-up.
On a computer, look for the same Login and Create Account options.
 (opens larger view)
 (opens larger view)
 (opens larger view)
Step 2: Enter your mobile number or email
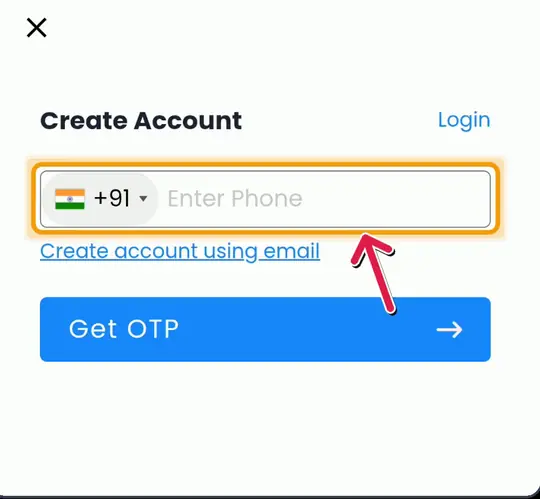
The Create Account box asks for your mobile number, with the +91 country code already selected. If you would rather use email, tap “Create account using email”. Then tap Get OTP. Vyapar sends a one-time password to your phone or inbox.
 (opens larger view)
Step 3: Apply the invite code with your OTP
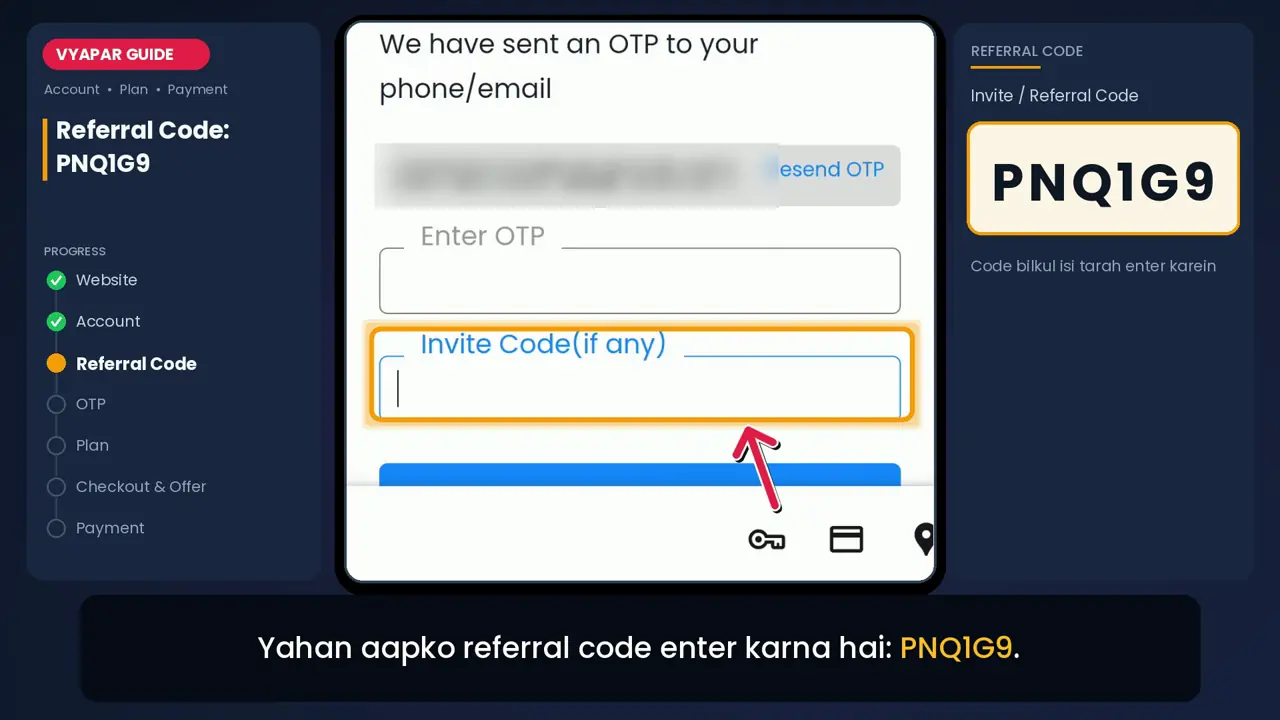
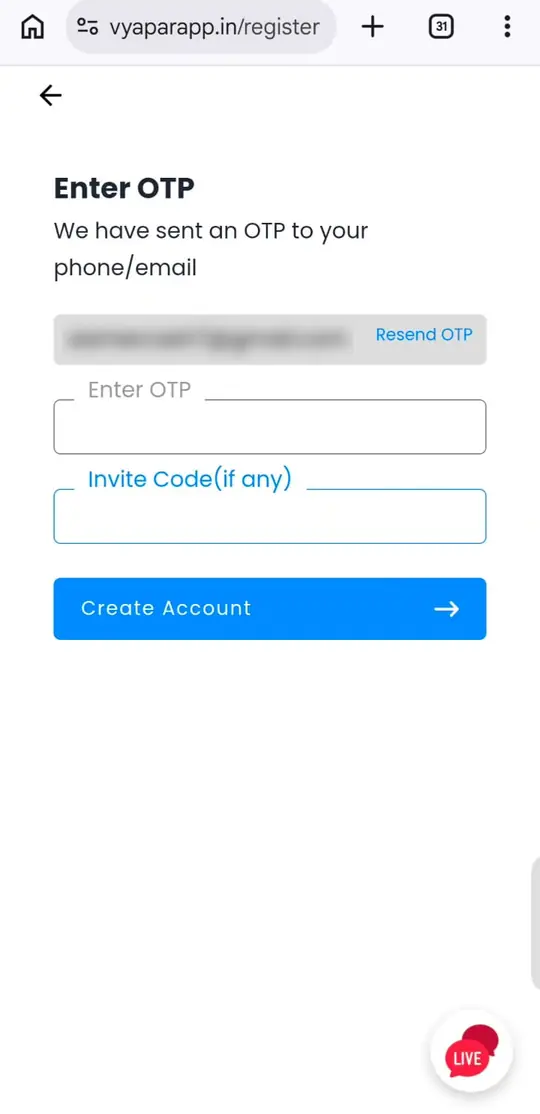
The next screen says “We have sent an OTP to your phone/email” and shows two boxes. Type the OTP in “Enter OTP”. In “Invite Code (if any)”, paste PNQ1G9 exactly as it is. It does not matter which box you fill first.
Check both boxes, then tap Create Account. This is the only screen with the invite code box, so take a second to make sure the code is there before you continue.
 (opens larger view)
Step 4: Choose your device type and duration
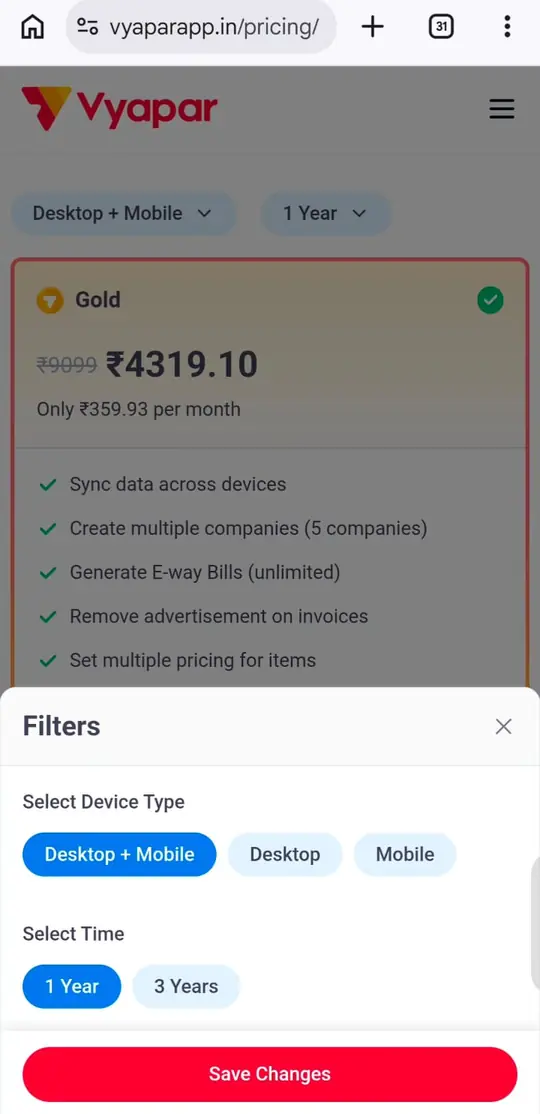
Once your account is ready, Vyapar opens the pricing page. At the top you will see two selectors, such as “Desktop + Mobile” and “1 Year”. Tap either one to open Filters:
- Select Device Type: Mobile, Desktop, or Desktop + Mobile if you want to use Vyapar on both.
- Select Time: 1 Year or 3 Years.
- Tap Save Changes. The prices on the plan cards update to match your choice.
 (opens larger view)
Step 5: Pick Silver or Gold
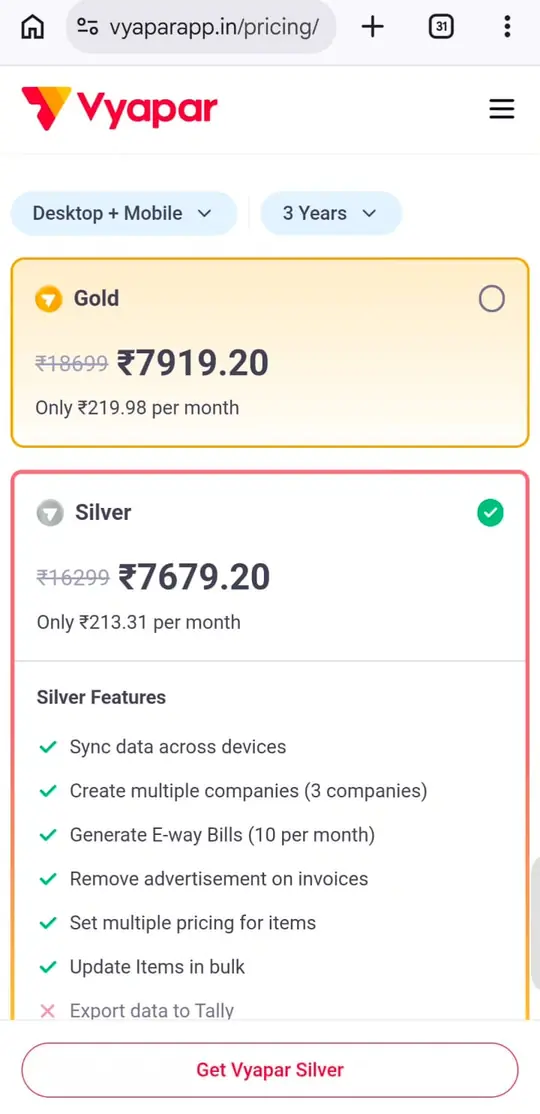
Compare the two plans and tap the button on the one you want, for example Get Vyapar Gold. These are the main differences we saw on the pricing page:
- Both plans: data sync across devices, no Vyapar advertisement on your invoices, multiple prices per item and bulk item updates.
- Silver: up to 3 companies and 10 e-way bills a month.
- Gold: up to 5 companies and unlimited e-way bills, plus Tally export, an accounting module, party-wise profit and loss reports, WhatsApp Connect and unlimited restore of deleted transactions.
 (opens larger view)
Step 6: Check the price and pay
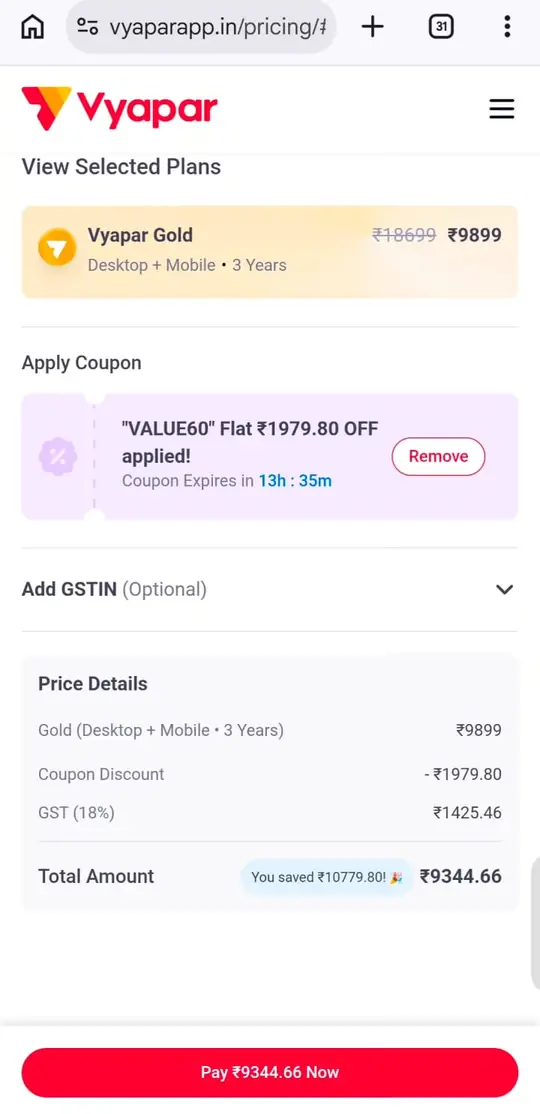
The checkout page, titled “View Selected Plans”, shows your plan, an Apply Coupon section and the price details: the plan price, any coupon discount, 18% GST and the total amount. During a sale, Vyapar may apply a coupon for you. There is also an optional field to add your GSTIN.
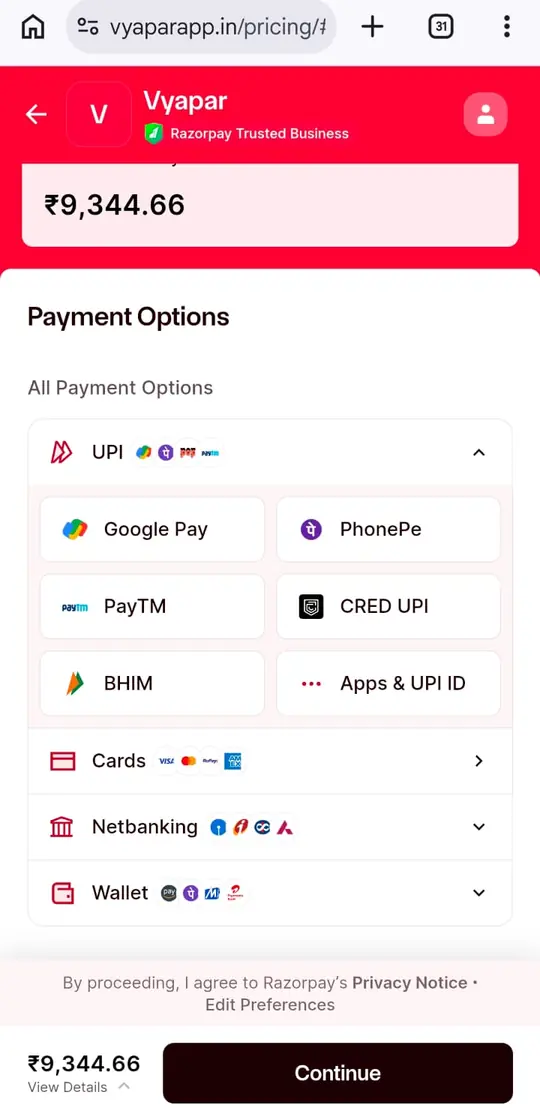
When everything looks right, tap Pay. A Razorpay page opens where you can pay by UPI (Google Pay, PhonePe, Paytm, BHIM and others), debit or credit card, net banking or wallet.
 (opens larger view)
 (opens larger view)
Vyapar referral code not working? Try these fixes
If the code does not seem to work, one of these is usually the reason.
The invite code box is missing
The box only appears when you create a new account. If you tapped Login instead of Create Account, or an account already exists for your number or email, you will not see it.
The code shows as invalid
Copy the code with the Copy Code button instead of typing it, and check there is no space before or after it. Letters and numbers that look alike, such as O and 0 or I and 1, are the most common typing mistakes.
The OTP did not arrive
Wait a minute and check your messages, or your spam folder if you used email. Then tap Resend OTP on the same screen.
You already created your account without the code
Contact Vyapar support from the app and ask whether the code can still be added. Only Vyapar can change your account, so we cannot add it for you.
Something looks different from this guide
Vyapar updates its website from time to time. We last checked these steps on 25 September 2026. If a screen looks different for you, please tell us so we can update this guide.
Still stuck?
Send us your question on our Contact page and we will help you through it. You can also read our FAQ page.